If you've ever found yourself standing in the cleaning aisle, holding a bottle of “natural” kitchen cleaner and wondering if it’s actually better than the regular stuff, you’re not alone. That’s why the DIY natural cleaning spray we’re about to share has gone viral in the crunchy community.
This homemade kitchen cleaner is simple, effective, and smells however you want it to. Best of all? You probably already have everything you need to make it in your kitchen right now.
In this post, we’re covering why store-bought cleaners are worth ditching, how this DIY cleaning spray works, how to make it, and how to use it at home.
If you’re tired of scanning ingredient labels, Googling mystery ingredients, and leaving the store feeling unsure about what you’re bringing into your home, this is for you. Let’s get into it.
The Problem with Store-Bought Cleaning Sprays
Not-so-fun fact: just because a bottle says “natural” or “eco-friendly” doesn’t mean it’s non-toxic. In fact, some of the worst offenders hide behind green, leafy logos and pretty packaging.
Most store-bought cleaning sprays are packed with synthetic ingredients that can trigger skin irritation, respiratory issues, or even hormone disruption over time—especially if you’re using them daily on countertops, highchairs, and kitchen surfaces.
We’ve had enough of kitchen cleaners that come with fine print warnings. Your kitchen should be your sanctuary, not a place where you’re constantly second-guessing the products you use.

Common Toxic Ingredients to Watch Out For
Let’s break down a few of the worst offenders hiding in your average store-bought cleaner:
- Synthetic Fragrance – That “fresh lemon” scent often hides dozens of undisclosed chemicals linked to allergies and hormone disruption.
- Sodium Lauryl Sulfate (SLS) – This foaming agent can strip your skin barrier and trigger irritation, especially for sensitive skin.
- Ammonia – Cuts through grime but releases harsh fumes that can irritate your eyes, lungs, and nose.
- Chlorine Bleach – Powerful but corrosive; harmful to breathe in and damaging to natural surfaces.
- Triclosan – A once-common antibacterial ingredient now linked to hormone imbalance and antibiotic resistance.
- Phthalates – Often hidden in synthetic fragrances and known to disrupt hormones and reproductive health.
Bottom line? You deserve better. Luckily, making your own DIY non-toxic cleaner is easier than you think.
The Bend-Approved Benefits of Using DIY Kitchen Cleaner
Lots of people steer clear of making their own natural cleaning products because it sounds like a lot of work. In reality, it’s incredibly easy and only takes a few minutes! This isn’t one of those recipes that requires 12 hard-to-find ingredients and trips to five specialty stores.
This DIY natural cleaning spray is simple, fast, and genuinely satisfying to make. Here’s why this non-toxic cleaner has become a staple in our homes:
- You’re in control. No harsh fumes or guessing what's inside, just real ingredients you know you can trust.
- It’s actually affordable. A bottle of cleaner shouldn’t cost more than dinner. This one costs pennies per spray.
- It works. This isn't just a feel-good swap. It’s a functional cleaner that cuts through grease, deodorizes, and leaves surfaces sparkling.
- It’s multi-purpose. Use it on countertops, sinks, bathroom surfaces, and even to freshen up the trash can.
- It’s safer for families. No worrying about toxic residue left behind on the surfaces your kids and pets touch.
The Viral DIY Natural Cleaning Spray Recipe
Here’s the exact recipe for our go-to homemade cleaning spray that has the crunchy community updating their spring cleaning checklists.
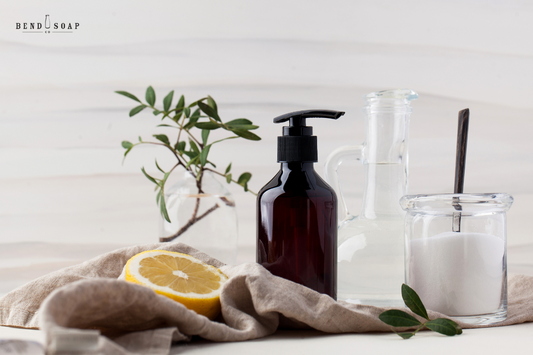
What You’ll Need
- 1 cup distilled white vinegar
- 1 tbsp baking soda
- 1 cup water
- 10–15 drops of essential oil (optional for fresh scent—think lemon, lavender, tea tree, or eucalyptus)
- Glass spray bottle
- Large mixing bowl
How to Make DIY Cleaning Spray
- In a measuring cup or bowl, combine the vinegar and baking soda slowly. It’ll fizz, so we recommend wearing protective eyewear.
- Once the fizzing settles, stir in the water.
- Pour the mixture into a clean glass spray bottle.
- Add essential oils if you’re using them.
- Store in a cool, dry place and shake gently before each use.
Pro Tip: Don’t use this spray on granite, marble, or other stone countertops. Vinegar is acidic and can etch the surface. For everything else? You’re golden.
Why It Works
There’s a reason this combo has stood the test of time. It’s not just crunchy folklore—there’s real science behind this simple pairing.
- Vinegar is acidic and works to break down grease, dissolve grime, and kill certain bacteria.
- Baking soda is gently abrasive, so it’s perfect for lifting stuck-on messes while neutralizing odors.
When you mix the two, they react to create carbon dioxide, which helps loosen dirt and debris while delivering extra cleaning power. The result? An effective cleaner that’s tough on messes and gentle on your home.
How to Use Your DIY Natural Cleaning Spray
 Your DIY kitchen cleaner can be used almost anywhere you’d normally use an all-purpose spray. Here’s a look at where to use it and where to avoid using it.
Great for:
- Kitchen counters (non-stone)
- Stovetops
- Inside the fridge
- Sinks and faucets
- Trash cans
- Cabinet fronts
- Lunch boxes and high chairs
- Microwave interiors
Not recommended for:
- Granite, marble, or stone countertops
- Electronics
- Unsealed wood
- Silverware
- Glass
- Aluminum
Homemade Cleaning Sprays: Your Questions, Answered
Can I Use Vinegar-Based Cleaner on All Surfaces?
Not quite. While vinegar is amazing for cutting grease and lifting grime, it's acidic—which means it can damage natural stone over time. Stick to sealed, non-porous surfaces like tile, glass, stainless steel, or laminate. When in doubt, always spot-test first!
How Long Does Baking Soda and Vinegar Cleaning Spray Last?
Because this recipe doesn’t contain preservatives, we recommend using your cleaner within a month for maximum freshness and effectiveness. Store it in a cool, dark place and shake before each use. It’s quick and easy to make, so small batches are the way to go.
Do I Have to Use Essential Oils?
Nope! The base ingredients (vinegar, baking soda, and water) do all the heavy lifting. But if you enjoy a fresh scent or want added antimicrobial benefits, essential oils like lemon, tea tree, or lavender are great optional add-ins. Just be sure to use high-quality oils and start small.
Can I Mix This DIY Cleaning Spray with Other Cleaners I Already Have?
Please don’t! Combining vinegar with bleach or ammonia can create toxic fumes that are dangerous to inhale. Stick to using this spray on its own. It’s powerful enough solo and doesn’t need any chemical backup to do its job.
Your Kitchen Called… It Wants to Go Non-Toxic
Making the switch to natural cleaning products doesn’t have to be complicated or expensive. This homemade cleaning spray is proof that you can keep your home clean, your conscience clear, and your surfaces sparkling—all with ingredients from your pantry.
Whether you’re brand new to non-toxic living or have been making your own swaps for years, this recipe is one of the easiest (and most satisfying) ways to embrace the non-toxic lifestyle. Have you made your own DIY natural cleaning spray before? Let us know in the comments!
Check out The Sudsy Scoop for more ways to ditch toxins and live a little crunchier, happier, and healthier.